


Thursday, March 31, 2011
Tuesday, March 29, 2011

Sunday, March 20, 2011
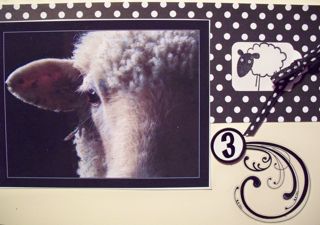
Spring Has Sprung!!!

Tuesday, March 15, 2011
Happy St. Patrick's Day!

May those who love us, love us.
And for those who don't love us,
May God turn their hearts.
And if he can not turn their hearts,
May he turn their ankles,
So we may know them by their limping.
May you live as long as you want, and never want as long as you live.
May you always be blessed
with walls for the wind,
a roof for the rain,
a warm cup of tea by the fire,
laughter to cheer you,
those you love near you,
and all that your heart might desire.
Saturday, March 12, 2011
Charm Pins from Charm Swap

On the left:
B bottlecap charm with beads from Judith at Poppy Cottage
Bird nest charm from Jen Phillips at eatpeanuts.blogspot.com
Bottlecap OXOX with heart from Michensey
Winged Heart from Erika at www.erikascraftingcorner.com
Bingo number from Roni at Ink Stains
In the center:
metal charms from Connie B
chain tassel from Roni at Ink Stains
Fairies Wanted from Pawprints Paper Crafts with Ginger
fuse and feather from Cher
child with crown from K Bryant
On the right:
Imagine charm with blue flower button from Kristy
Teal bottle charm from Mindy
Roses acrylic charm from Emma
Pen nib with black jewel from Roni at Ink Stains
a second Imagine charm with a zipper piece from Kristy
I LOVE these! I will wear the pins a lot! And from time to time I may remove a charm to wear on a chain or a ribbon. What fun I had creating my charms for this swap. I look forward to participating in another one.
Sunday, March 6, 2011
My First Charm Swap
Last week I sent three sets of charms I made to Indiana for a charm swap--send five charms in a set and get four different ones from other participants back (organizer of swap keeps one) along with a pin for wearing them. This is what the pin looks like:

I've never done this before. In fact, I'd never made anything like this before except for the glass slides/metal framed ones a la Tim Holtz. Here are photos of what I sent:
 |
| Button, button... |
 |
| In your future... |
 |
| Fishing for Compliments I also made charms that I gave to the radiation gals--Heather, Jessie, and Dawn:  Part of the fun was stamping the tags and attaching the charms. I can't wait to see what I get back from the swap! I'm getting a dozen back!!! |
Thursday, March 3, 2011
Mango Papers Quilt
This is my blog post for OUTSIDE THE BOX which was published on February 28th.
Don't you just LOVE the new 8 1/2" X 11" papers from Memory Box?!!! Key Lime, Squash, Mango, Cranberry, Currant, and Bubblegum. Thistle, Pool, Bluebird, Blueberry, Vanilla Bean, and Licorice. I LOVE them all!!! I don't usually use orange tones on cards I make, so I challenged myself to come up with an idea to use all of the new Mango papers--Distressed Dots, Dots, Moroccan, and Gingham. In the July/August 2002 issue of The Rubber Stamper (one of the magazines in my hoarded collection), I found a design by Susan Cobb that I used for the front of this card that is just perfect for highlighting the Mango paper collection!
- Papers: Mango Distressed Dots, Dots, Moroccan, and Gingham
- Cardstock: Orange, Red Orange
- Adhesives: Double-sided tape, pop dots
- Stamp: E1713 Wonderland Butterfly
Cut all of the Mango papers.
One 4 7/8" square from Dots
Four 1" squares from Gingham
Two 1 1/2" squares from Distressed Dots, each cut in half diagonally to make four triangles
One 2 1/2" square from Gingham
One 2 1/2" square from Moroccan
Cover the front of the card with the 4 7/8" Dots square.
Mount the four 1" Gingham squares on Orange cardstock, trim close; then mount on Red Orange cardstock, trim close; adhere one to each corner of the card front .
Mount the four triangles on Red Orange cardstock and layer onto the card front between the corner squares.
Using the 2 1/2" Gingham square, rotate it into a diamond and center it over the triangles.
Place the 2 1/2" Moroccan square centered over the diamond.
Add a 2 1/4" square cut from Red Orange cardstock to the center.
Mask the front of the card so that only the Red Orange square is showing. Stamp E1713 Wonderland Butterfly in Archival Sepia ink.
Stamp E1713 Wonderland Butterfly two more times on Moroccan paper in Archival Sepia. Cut these out.
Adhere one butterfly to the Red Orange square, lining up the design. Use pop dots to place the second butterfly on top of the first.
Cover the inside of the card with Gingham (on the back of the card front) and Moroccan papers. Moroccan is light enough for writing a message and for stamping another image or sentiment.
There are so many ways to change up this card idea using the four designs of any one of the paper colors and selecting coordinating cardstock colors for layering for very different looks. A sentiment could be stamped in the center, perhaps B1354 Happiest Birthday with the tiny butterfly on the side added multiple times in the square. Two or three of the smaller C1714 Cocoa Bean Butterfly could flit in 3-D across the card front. The center square could also be stamped with E1715 Leafy Background before adding a sentiment or layering on another stamped image. E1426 Reverse Bird Branches or E1427 Reverse Bird Grass could also be trimmed to use as the center square. Ooh--how about embossing an image for the center square?!!! I could go on and on! Just browsing through the latest Memory Box catalog encourages me to think of even more ways to decorate this card front for lots of different occasions!
Tuesday, March 1, 2011

Subscribe to:
Posts (Atom)